[Notebook] How to update BIOS?
When MSI notebook computers encounter problems, updating the BIOS may help solve your problem; two ways to update the BIOS are introduced below:
Note:
- Do not disconnect the power supply during the BIOS update and be careful not to press any keys on the keyboard or mouse, and plug or unplug any devices. Failure to update may result in the device failing to boot up.
- Please read the steps written in this article carefully before updating the BIOS. If you find it difficult to execute, it is recommended that you send the computer to the nearest MSI service center to update.
- If you find that the progress bar is stuck and the screen froze during the update process, please wait patiently for another 3 to 5 minutes. If the phenomenon persists, please contact the MSI Customer Service Center.
- The BIOS screen may vary due to different motherboards and if you have any concerns regarding the procedures, please contact the MSI Customer Service Center.
Updating from the BIOS menu
Download BIOS File
1. MSI Website Click the “Magnifier” icon in the top right. Using the Raider GE78 HX 13V as an example, select the “Search” icon in the top right and enter “Raider GE78 HX 13V”, then press “Enter” to search.

2. Click “Download”.

3. Select your model.
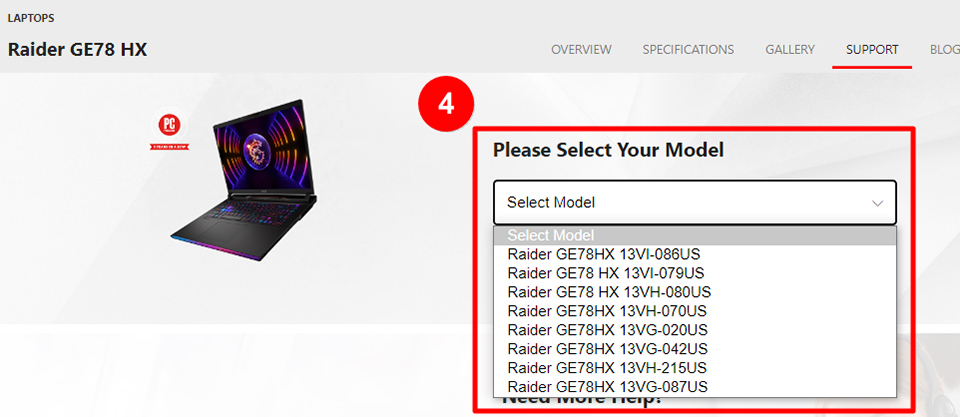
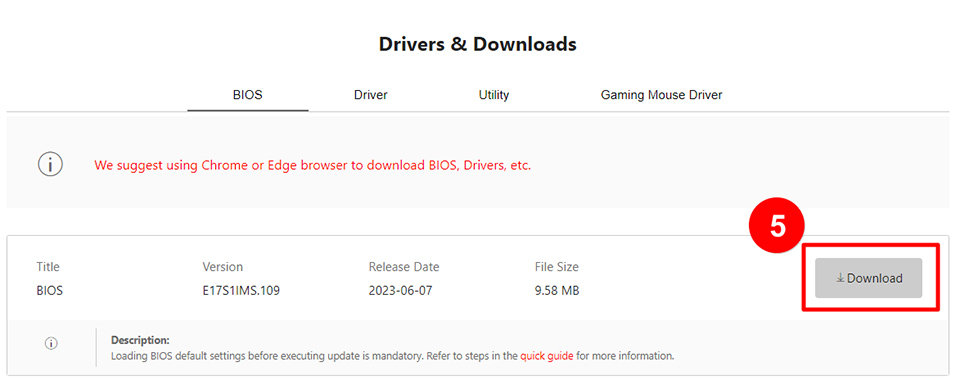
4. Download the BIOS file from the BIOS menu.
Creating BIOS Disk
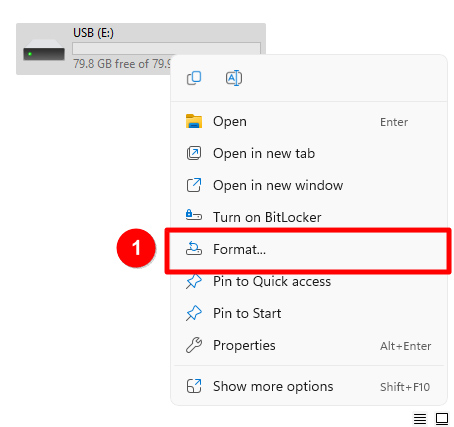
1. Connect the USB flash drive to the computer, right-click on the USB flash drive, and select “Format.”
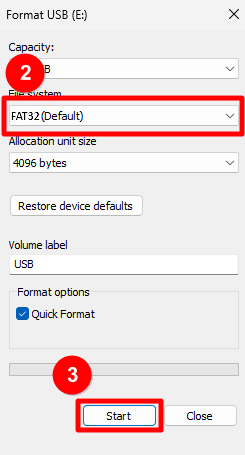
Note: Formatting will clear all data contained within the USB drive, and the purpose of this step is to convert the USB format to FAT32. Using a USB flash drive with other system formats such as NTFS or exFAT will not allow you to update the BIOS.
If your flash drive is already in FAT32, you don’t need to format it and can directly continue from Step 3.
2. Select “FAT32” for “File System” → select “Start.”
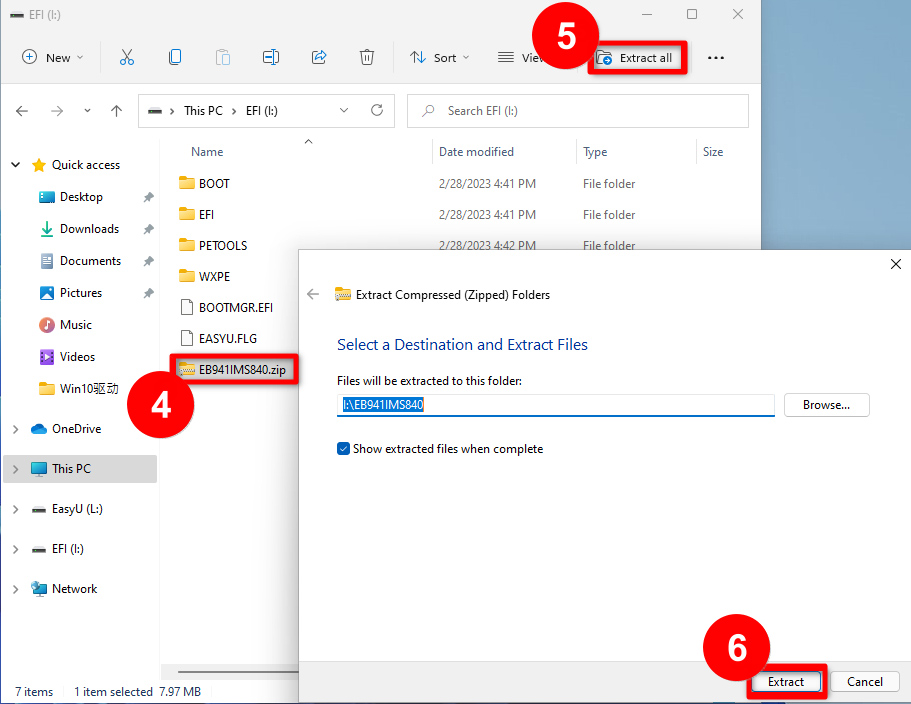
3. Unzip the downloaded BIOS file and copy it to a USB flash drive.
Update BIOS
1. Insert the flash drive with the BIOS file into the computer and then restart the computer; when the MSI logo appears, please hold down the “Del key” to enter the BIOS interface.
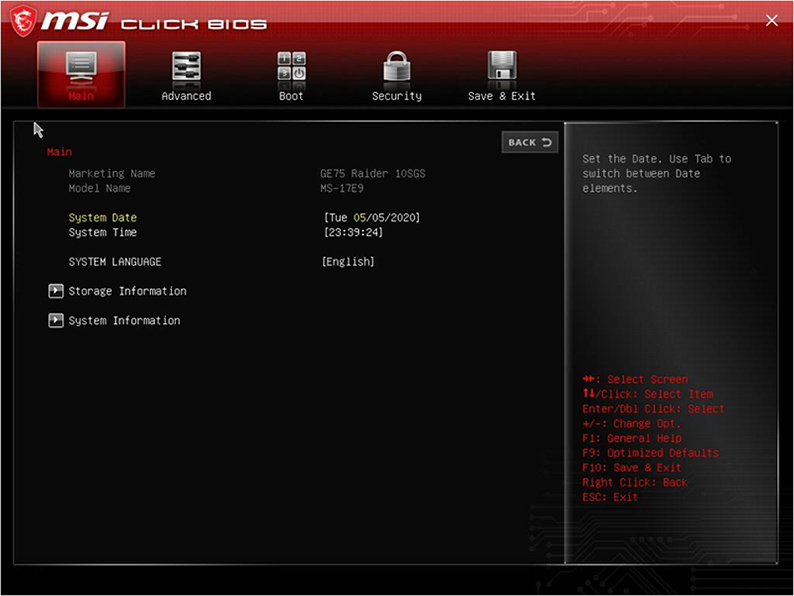
2. Use the arrow keys to switch to the “Advanced” page, and then use the arrow down key to move to the “UEFI BIOS Update” option, and press the “Enter” key to go to the next step.
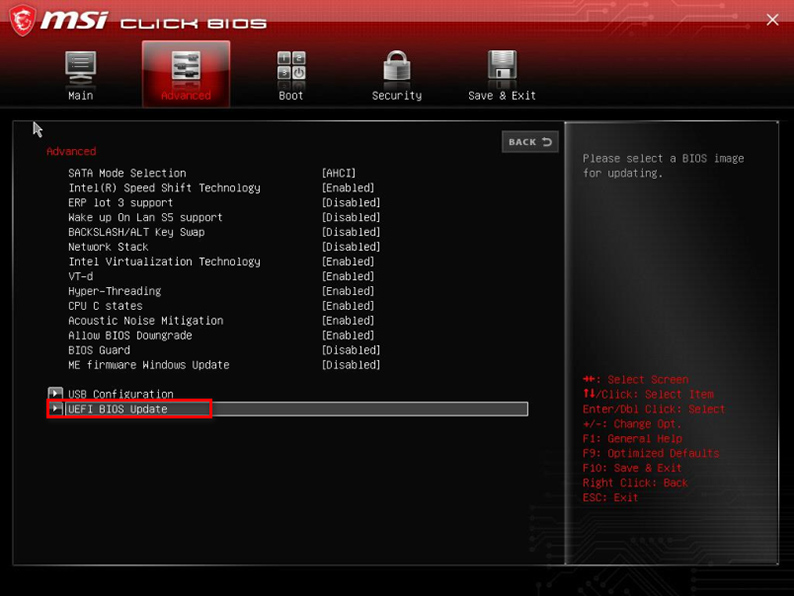
3. Under the “UEFI BIOS Update” option, press the “Enter key” to go to the next step.
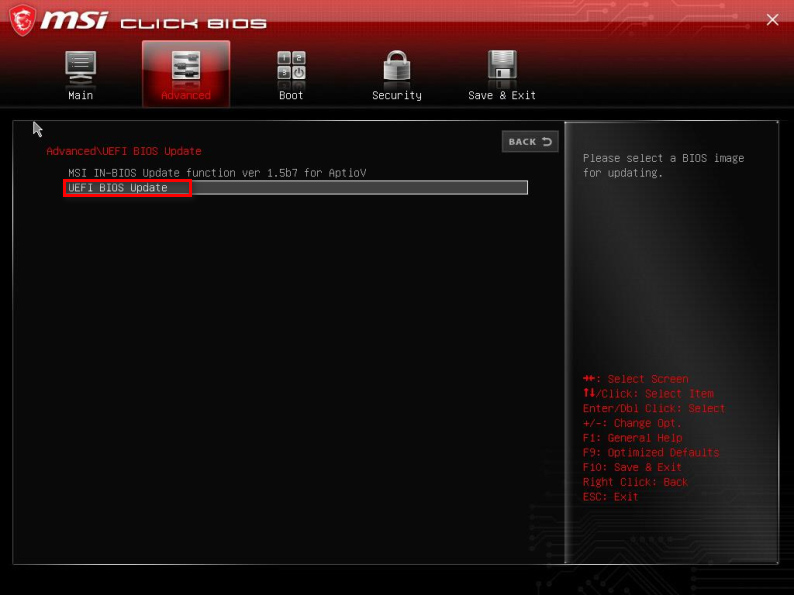
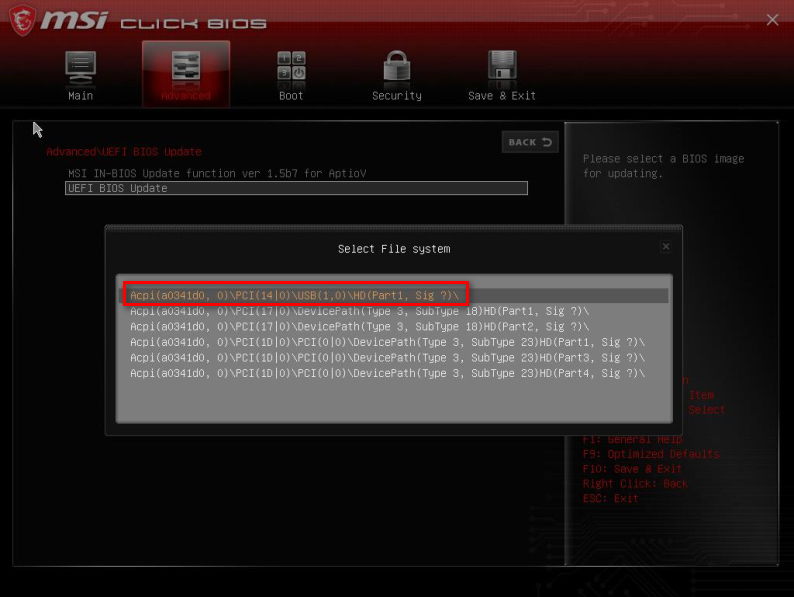
4. Select the location where the BIOS file is saved, then press “Enter” to go to the next step.
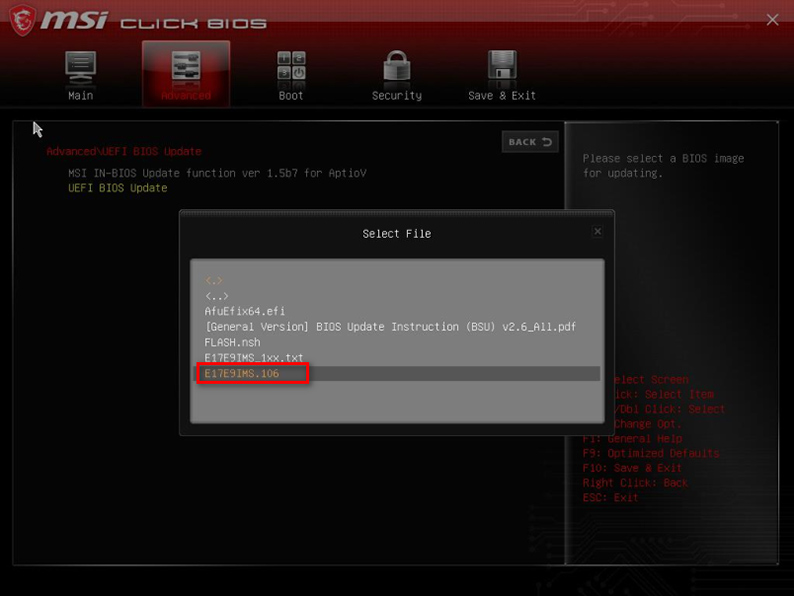
5. Select the BIOS file, and then press the “Enter key” to go to the next step.
6. When the page prompts whether to update the BIOS, select “YES” to go to the next step.
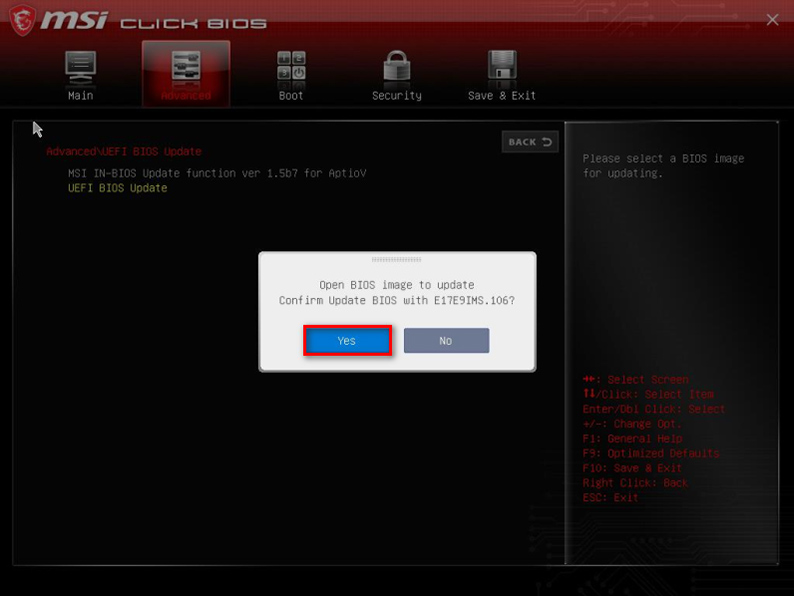
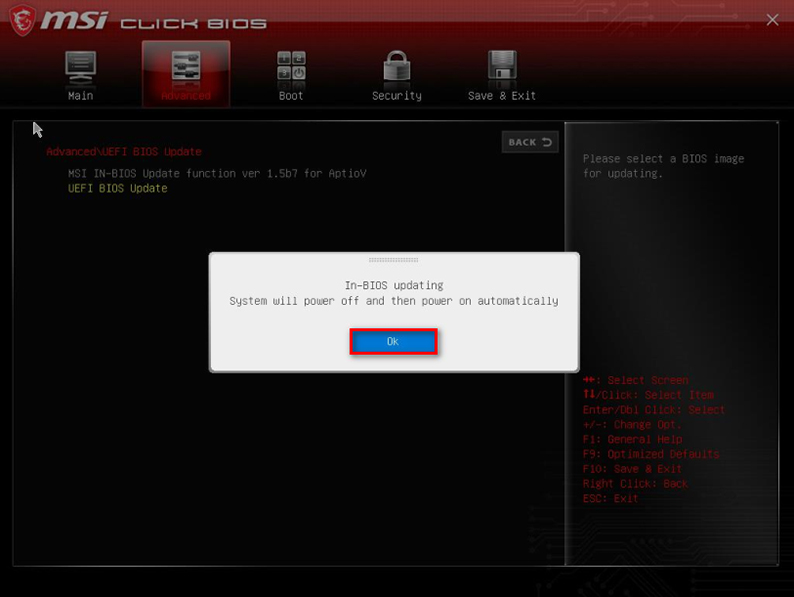
7. After selecting “YES”, the system will show the prompt that it needs to restart; please click “OK” to go to the next step.
8. After the system restarts, it will enter the BIOS update page automatically; please press the “Enter key” under the “Proceed with flash update” option to enter the update BIOS program.

9. When the prompt “Flash update completed. Press any key to reset the system/Press enter key to reset the system.” appears, it means that the BIOS update has been completed successfully; click the corresponding key to restart the computer.

Updating BIOS through Windows Update
Windows 11
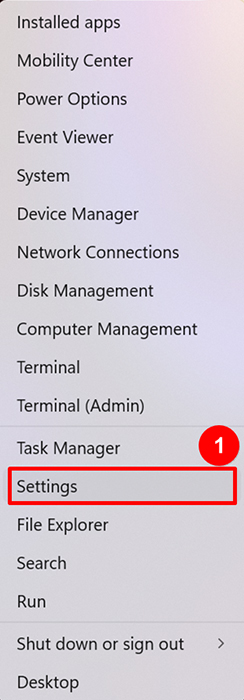
1. Open Windows Settings.
2. Move to the page below:
Windows Update → Advanced options.

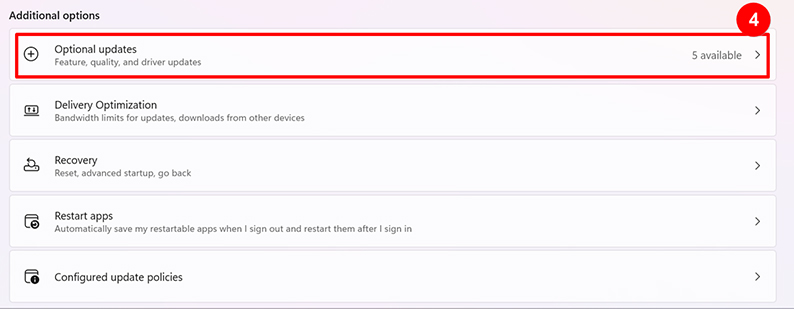
3. Click Optional updates.
4. Expand the pull-down menu.
5. Select “Micro-Star International Firmware” and then click “Download & install”.
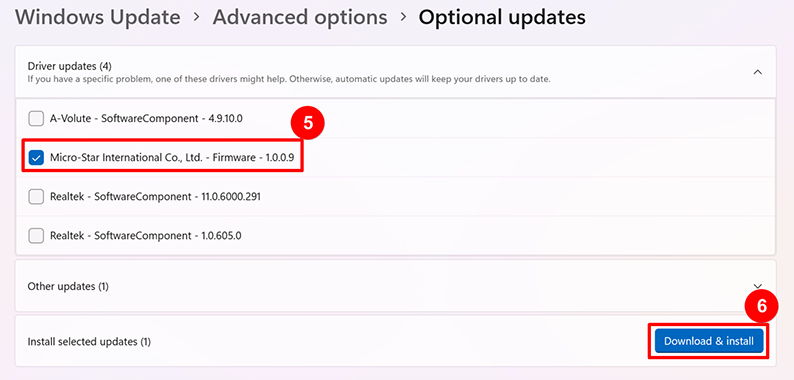
6. Wait for the update to finish and then restart the notebook computer.
Windows 10
1. Open Windows Settings.
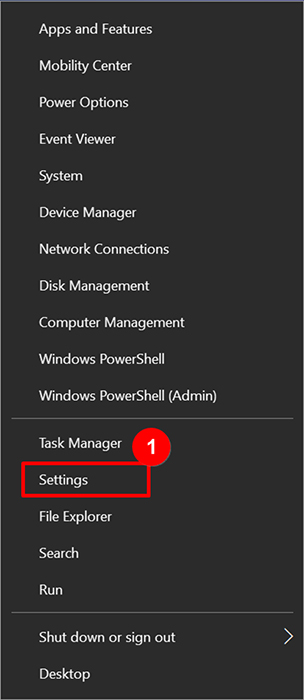
2. Click “Update & Security”.

3. Click “View optional updates”.
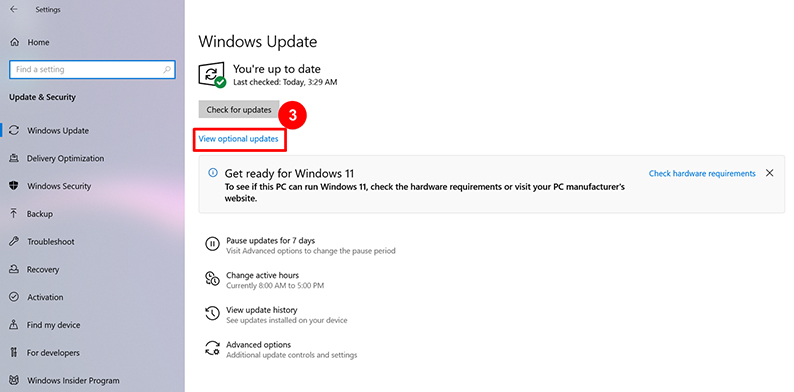
4. Expand the pull-down menu.
5. Select “Micro-Star International Firmware” and then click “Download & install”.
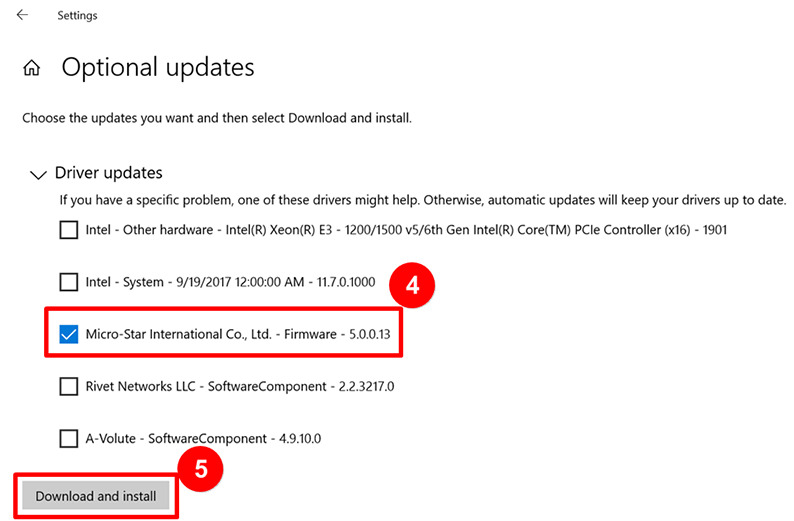
6. Wait for the update to finish and then restart the notebook.


